Arms and Legs
by Al Stevens
al@alstevens.com
In this procedure you build arms and legs and install them on the torso. Page 169 in Chapter 8. Painting and Body Construction in Figure Making Can Be Fun discusses arms and legs. The Fred project follows those procedures closely and uses the dimensions for the size 4 body shown in
the article
Body Dimensions for Size 3 and 4 Figures.
Arms
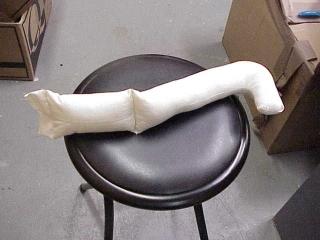
Each arm is a tube made from muslin and filled with polyester fiber stuffing. The length of the tube is a function of the desired arm length (15 inches) and the length of the hands (7 inches if you use the
Pro Ventriloquist Dummy Hands
kit, which this project uses) plus some additional length at either end for attaching to the shoulders and hands.
Making the Arms
Do the following procedure twice, once for each arm.
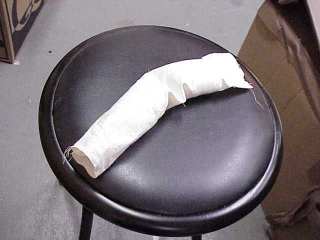
- Cut a rectangle of muslin 12" by 7".
- Fold the rectangle over to form the arm.
- Stitch the arm into a tube with a 1/2" hem.
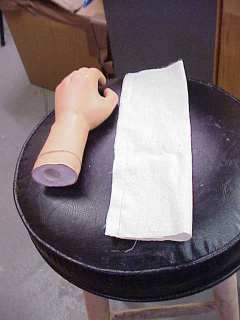
This procedure assumes you are using the Pro Ventriloquist Dummy Hands kit, which have a 6 inch wrist circumference. If you use different hands, the circumference of the muslin arm tubes not including the hem must fit those hands.
- Turn the tube outside out.
- Sew a horizontal stitch 6 inches from either end of the arm tube. This stitch is the figure's elbow.
- Fill the bicep end of the arm with polyester fiber stuffing up to 4 inches up from the elbow. This stuffing can be loosely packed.
- Sew a horizontal stitch 4 inches up from the elbow, which is 2 inches from the upper end. This stitch keeps the stuffing in place.
- Sew a stitch across the very top of the arm tube to prevent fraying. There should now be an unfilled end at the top 2 inches long, which will attach the arm to the shoulder.
- Fill the forearm end of the arm with polyester fiber stuffing to 4 inches down from the elbow. This stuffing can be loosely packed. Leave the hand end of the arm unsewn so you can attach the hand later.
Attaching the Arms
- Staple the unfilled ends of the arms above the bicep onto the ends of the shoulder piece.
- If you are using the
Pro Ventriloquist Dummy Body
kit for the torso, hammer the sharp staple ends down inside the body.
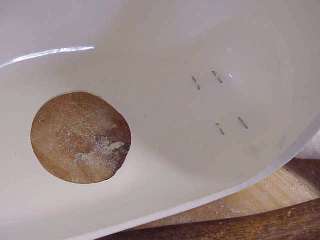
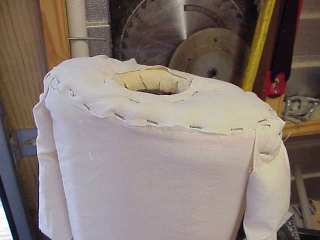
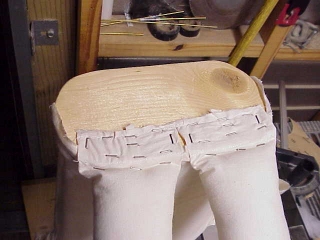
Shoulder Padding
- Cut out a shoulder pad from cotton batting in the shape of and slightly smaller than the shoulder piece. The hole should be larger than the shoulder piece's hole.
- Cut a shoulder piece cover from muslin about the same size as the shoulder piece.
- Place the shoulder pad on the shoulder piece.
- Place the shoulder cover on the shoulder piece.
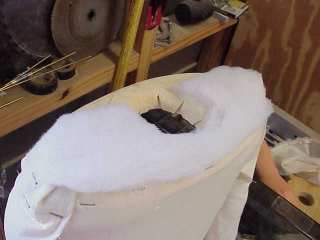
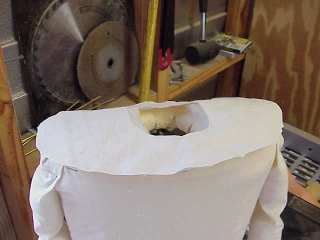
- staple the shoulder piece cover onto the shoulder piece.
- Ensure that the staples around the neck socket are far enough back from the socket to prevent the neck from rubbing them.
Legs
You have two ways to make the legs: with and without sculpted bare feet.
Making the Legs with the Bare Feet Option
First you need some feet. You can make your own or you can buy some feet from the Puppets and Props
Pro Ventriloquist Dummy Feet
web page. Fred as built for this project did not use this option, but I've added the procedures here for installing the feet.
This procedure is almost the same as building arms described above.
Do the following procedure twice, once for each leg.
- Cut a rectangle of muslin 17" by 9".
- Fold the rectangle over to form the leg.
- Stitch the arm into a tube with a 1/2" hem at the top tapering the hem so that the bottom width has a circumference of 7"
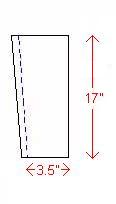
This procedure assumes you are using the Pro Ventriloquist Dummy Feet kit, which have a 7 inch calf circumference. If you use different feet, the circumference of the muslin leg tubes not including the hem must fit those feet.
- Turn the tube outside out.
- Sew a horizontal stitch across the front of the leg 8 inches down from the top. This stitch is the figure's knee.
- Fill the thigh end of the leg with polyester fiber stuffing up to 6 inches up from the knee. This stuffing can be loosely packed.
- Sew a horizontal stitch 6 inches up from the knee, which is 2 inches from the upper end. This stitch keeps the stuffing in place.
- Sew a stitch across the very top of the leg tube to prevent fraying. There should now be an unfilled end at the top 2 inches long, which will attach the leg to the seat.
- Fill the calf end of the leg with polyester fiber stuffing to 3 1/2 inches down from the knee. This stuffing must be tightly packed. Leave the foot end of the leg unsewn so you can attach the foot later.
Making the Legs without Bare Feet
Each leg is a sock shape made from muslin and filled with polyester fiber stuffing. The length of the leg is a function of the desired leg length (18 inches) plus some additional length at the top for attaching the legs to the seat piece.
Do the following procedure twice, once for each leg.
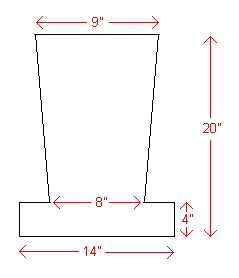
- Start with a piece of muslin at least 14" x 20".
- Cut out the leg as shown in the following diagram.
- Fold the muslin at the back of the leg.
- Sew the leg closed with a 1/2 inch hem as shown in this diagram.
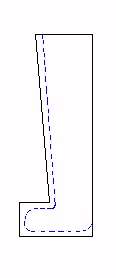
- Trim the excess hem.
- Notch the instep so the hem does not bunch up.
- Turn the leg outside out.
- Fill the foot and shin/calf with polyester fiber stuffing up to 12 inches above the bottom of the foot. This stuffing should be tightly packed.
- Sew a horizontal stitch across the front of the leg 12 inches above the bottom of the foot. This stitch is the figure's knee.
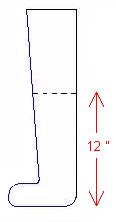
The knee stitch is critical. You must make it directly across the front of the leg as the foot sticks forward. Otherwise the foot will aim inward or outward unnaturally.
- Fill the thigh with polyester fiber stuffing up to 6 inches above the knee. This stuffing can be more loosely packed than the foot and thigh, but, being the figure's thigh, it should not be too spindly.
- Sew a horizontal stitch across the front of the thigh 6 inches above the knee.
The thigh stitch is critical, too. As with the knee stitch, the thigh stitch must be directly across the front of the leg as the foot sticks forward.
- Sew a stitch across the very top of the thigh part to prevent fraying. There should now be an unfilled end at the top about 2 inches long, which will attach the leg to the seat piece.
Attaching the Legs
- Turn the torso upside down.
- Staple the part of the legs above the thigh onto bottom of the seat piece.
- If you are using the
Pro Ventriloquist Dummy Body
kit for the torso, hammer the sharp staple ends down inside the body as you did with the arms.:
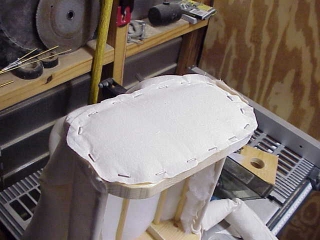
Seat Padding
- Cut out an oval of cotton batting the shape of the seat piece and slightly smaller.
- Cut an oval of muslin the same shape and size as the seat piece.
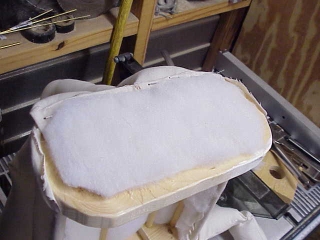
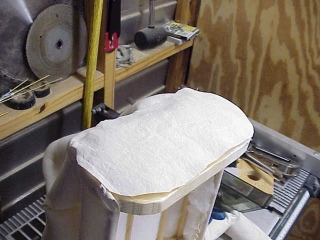
- Place the batting on the bottom of the seat.
- staple the muslim oval onto the seat piece.
The body is almost complete. It will be when you finish and attach the hands and feet in the next procedure.