Irises
by Al Stevens
al@alstevens.com
Irises are, for this discussion, the part of the eye that isn't the white. Anatomically, the part you are going to install with this procedure includes the iris, the cornea, and the pupil, but that's too much to say every time. Rather than be "anatomically correct," we'll just call them the "irises."
Selecting Irises
You must decide what kind of irises you want, a decision usually driven by what is available and how much trouble you are willing to undertake. You can purchase irises (see
Suppliers
) or you can make them yourself (
Making Life-like Dummy Eyes).
Page 133 in Figure Making Can Be Fun has a comprehensive discussion of your options for acquiring or manufacturing irises.
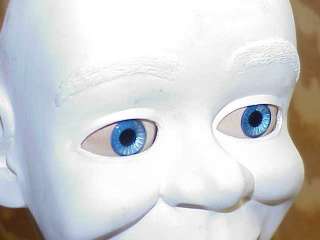
This project uses 15 mm plastic transparent blue irises which I purchased specifically for Fred. You can also use 16 mm or 18 mm irises. See the Suppliers page for where to get them.
Positioning the Irises on the Eyeballs
Next, you have to figure out where on each eyeball its iris must go. Some figure-building literature advises you to put them perpendicular to the axle just as you did the holes for the syncro bar in the previous section. That's too scientific for me, and it can be wrong. Perfectly placed irises can look, well, cock-eyed if the eyeball mounts are imperfect. Here's a better way.
- Place the eye assembly in the head on its shelves.
- Make sure that the assembly is resting flat on the shelves just the way you are going to install it later.
- Turn the head around.
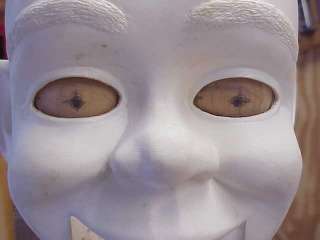
- Holding the assembly in place with one hand, and being careful that your grasp does not interfere with the self-centering mechanism, mark with a pencil where you want the center of the irises to be when Fred is looking straight ahead.
Iris Holes in the Eyeballs
- Remove the assembly from the head and disassemble it.
- Put a drill bit into your drill press the size of the diameter of the iris's stem. (Plastic irises have small cylindrical stems in the back.)
- Center the drill press platform so that the bit is lined up with the center of the platform's hole.
- Put the eyeball in the drill press platform's hole.
- Rotate the eyeball until the point of the bit touches the pencil mark you made on the eyeball for the iris's position.
- Set the drill press's vertical stops to drill a hole the distance from the face of the iris to the end of its stem.
- Put on a heavy glove. I don't want you injuring your hand.
- Hold the ball firmly with your gloved hand and drill the hole.
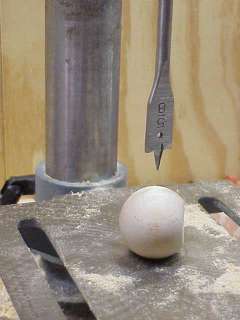
- Put a woodboring (spade) bit into your drill press. If you are installing 15 mm irises, use a 5/8" woodboring but. For 16 mm irises use an 11/16" woodboring bit. For 18 mm irises use a 3/4" woodboring bit.
- Center the drill press platform so that the center of its hole is directly below the point of the woodboring bit.
- Put the eyeball in the drill press platform's hole.
- Rotate the eyeball until the point of the woodboring bit is dead center over the center of the hole you just drilled.
- Set the drill press's vertical stops so that you will countersink a hole deep enough that the iris, when inserted is flush with the curvature of the eyeball.
- Put on a heavy glove again. I still don't want you injuring your hand.
- Hold the ball firmly with your gloved hand and drill the hole.
- Repeat this procedure for the other eye unless, of course, you are making a one-eyed character, in which case you better be making an eye patch.
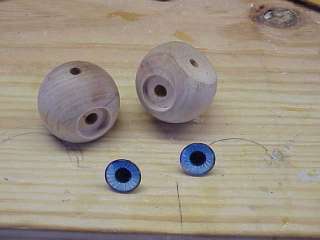
- Use fine sandpaper to sand the iris holes smooth.
Here's what the eyeballs look like ready to receive their irises.
Checking Out the Irises
- Put the irises into the eyeballs (do not glue them in place).
- Reassemble the eye assembly.
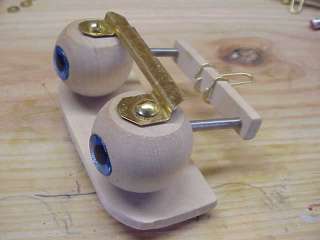
- Put the eye assembly into Fred's head.
- Ensure that the eyes move freely when you move the synchro bar and that they return to center when you release the synchro bar.
- Make sure that the eyes move far enough to either side.
If you are installing blinkers, go on to the next page.
Completing the Eye Assembly
If you are not installing blinkers you can complete the eye assembly at this time.
Painting the Eyeballs
- Remove the irises from the eyeballs.
- Remove the eyeballs from the eye assembly.
- Paint the eyeballs as described in
Painting the Eyeballs.
- When the eyeballs are dry, glue the irises into their holes with Elmer's glue.
- Reassemble the eye assembly.
Final Assembly
Using two 3/8" ignition wrenches, tighten the two nuts against one another so that the eyes move freely but there is no wobble or up and down motion of the eyeballs.